Catweasel ISA online manual
Reading 1541 reverse sides
Quick links:
In-depth description of the tools
Software installation, basic usage
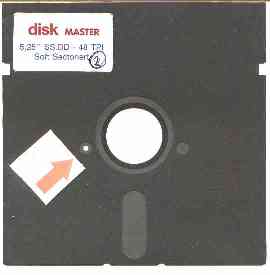
On the C-64, it was common use to flip the disk in order to double it's space. This was even possible with disks that have been sold as "single-sided" disks. A simple cut in the right place has removed the write-protection of the reverse side, and the 1541 was able to make use of the flipside. Today, the diskdrives need one more hole to check if the disk is spinning or not, and that is the index hole. Back in the 80's when the C-64 was popular, special disks have been sold that have this additional hole (red arrow marks that reverse-side index hole):
If you flip the disk, the index hole is in the wrong position, and the drive cannot tell wether the disk is spinning or not. Since there are no index pulses, the drive assumes that the disk is not spinning, and therefore the data lines to the Catweasel controller are disabled. The problem why you cannot read the reverse sides is not located in the Catweasel controller, but in the 5,25 inch drive. Some hardware patching is necessary to work around this.
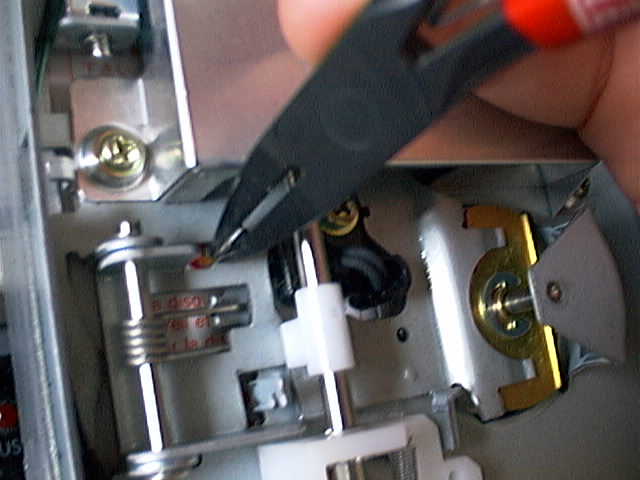
First of all, locate the photo-resistor that "sees" the index hole. Cut the two wires that come out of the photo-resistor:
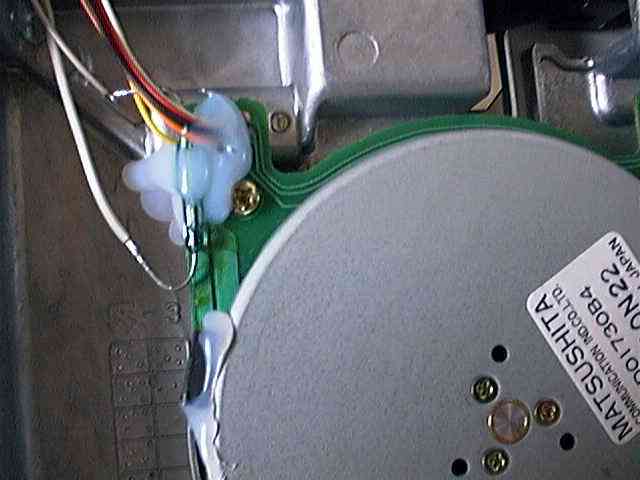
Now bring these two wires to the bottom side of the drive. With the example drive (a Panasonic/Matsushita drive), it is necessary to extend the cables a bit (grey wires glued to the drive electronics):

The next step is a bit tricky and you may need some time until you find the correct position for the magnet and the reed-contact. Some combinations of magnet and reed work fine on the first try, and others need some adjustment until you find the best distance between magnet and reed.
After glueing the reed to the position you chose, it is strongly recommended to check it's function with a multimeter. Although you may hear a clicking sound on every rotation, the two wires are not electrically connected when the magnet is near. This has happened with a number of reed-contacts from one batch, but it doesn't mean that a different vendor does not provide better quality. Since testing only takes a few seconds, you should take that time.
In no case can the magnet harm the health of your disks. It's magnetic field is so low and so far away from the surface of the inserted disks, that you don't have to fear anything for your disks.
After you made sure that the two contacts of the reed are connected when the magnet is near, and after soldering these two contacts to the two wires that initially came out of the photo-resistor, your drive can also read the reverse sides of 1541 disks.
Why is the hack necessary, my drive is double-sided!
Yes, your drive is double-sided, but the positions of the two heads are slightly
shifted in a way that the upper head (which would read the reverse side) starts
at track 4 instead of track 1, so you would not have the chance to read the whole
disk. Another problem is that the head is not exactly at track 4, so only
a few disks may be readable. We decided not to support reverse sides in double-
sided drives, because it would only cause confusion: Disks that work fine on the 64
may cause problems in that mode, and you would not have access to all the files.
Maybe we will publish a tool that displays the directory of the reverse side
with an unmodified drive, so you can check if it's worth the effort of hacking
your drive or not.
This document © Copyright 2000 Jens Schönfeld, individual Computers.